Webex is a great online conferencing and meeting tool. 1UC offers a huge array of training courses around different UC technologies and we have decided to share this basic quick start guide to using Webex to help all of you who may be new to working for home.
A brief video guide that walks you through these functions is available on our Youtube channel and below.
Getting started and setting up Webex for the first time
You can use WebEx through a web browser however, to get the best experience, we strongly recommend downloading the WebEx application.
- If you are using a smartphone or tablet this can be done via the App store or Play store (Search Webex meetings).
- On a computer go to https://www.webex.com/downloads.html Here you can download the application depending on the device that you are using. We are going to concentrate on the download for Microsoft Windows.
- After selecting download, you’ll see the WebEx app downloading to your computer. the screen will also change. Wait for a few minutes and when the download has completed, either double click or select open.

- The wizard will take you through running the software and as with most software, you will need to accept the t’s and c’s.
- Select finish and you will see the desktop app will open on your screen.
Setting up a free account
You can be a guest on a call without having an account, however you will need to sign up for a Webex account to host a call. When you sign up for a free account, you’ll receive Unlimited usage (no meeting time restrictions) Support for up to 100 participants (up from 50).
You can sign up for a free account at https://cart.webex.com/
Enter your personal details and then activate your account. WebEx will send you an email and you’ll need to open the email and click on the create password link.
Once you have clicked on the link, you’ll be taken back to WebEx where you can create your new password. Once all done, click on sign in and you’ll be logged into your WebEx account on the web.
Don’t forget to use the same email address and password to login to the desktop app
Scheduling a meeting
Scheduling a meeting using the Webex Outlook plugin.
Scheduling a meeting using the WebEx plug in within outlook is by far the easiest and quickest way to setup a new WebEx meeting.
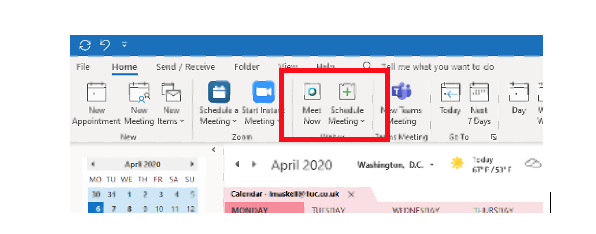
In Outlook, go to your outlook calender and create a new invite. In the invite, you can see the WebEx plug in at the top.
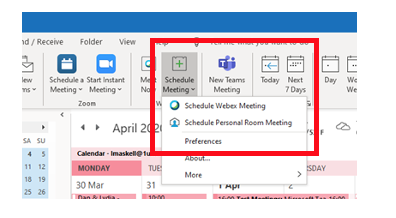
Then choose one of the following-
- Schedule Webex Meeting (Secure Meeting Room generates a password, URL and meeting ID each time)
- Schedule Personal Room Meeting (Less secure is an open door advised to use for internal only)
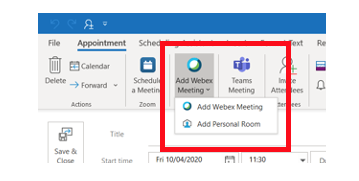
You will need to decide what type of meeting we want to schedule, ‘WebEx Meeting’ or a ‘personal room’ meeting. It’s worth understanding the differences between them as it will determine which type of meeting you use going forward.
If you are scheduling a meeting with someone you know and you have regular calls with, then go ahead and use the personal room option. All the meeting links for your personal room will never change. But be aware that if someone has your personal room link, they might pop in uninvited.
If you’re having a meeting about any sensitive issues and you want to ensure no unwelcome visitors accidentally join, it’s best to use the WebEx meeting option. These meetings have different details every time one is scheduled. once you’ve finished in that meeting, the joining details become redundant. This is a much more secure option compared to using your Personal room. Don’t forget you can still lock your personal room once you are in it.
You can also do this by first selecting the date you want to schedule for and then clicking the outlook plugin.
Because we have scheduled a WebEx Meeting, the below pop up will appear and you can now create a meeting password and decide on some other options.
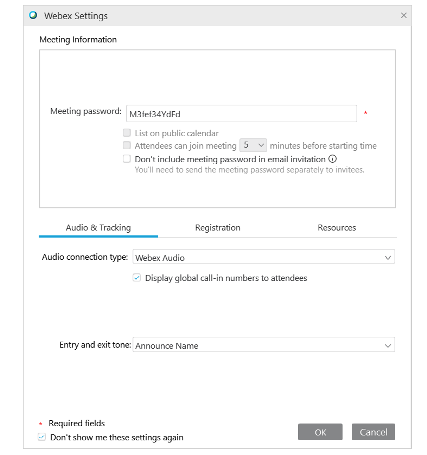
Click on ok and go back to the invite.
Don’t forget to sort out the usual invite details and then send the invite when you’re ready.
Scheduling a meeting from the Webex desktop app
If you don’t have outlook, you can use the desktop app to easily schedule WebEx meetings. The process is very similar to scheduling a meeting in Outlook.
Essentially the only difference between the two is how the calendar invite is generated.
On the desktop app, click on the grey ‘Schedule’ button and an Outlook calendar invite is created.
From this point you’ll find all the steps are the same as scheduling a meeting directly in Outlook.
Select the type of meeting you want to schedule and set the usual invite details.
When you’re ready, hit send.
Starting a Meeting
There are a few ways to start a meeting however the easiest way is from the Webex desktop app or the Outlook calender invite.
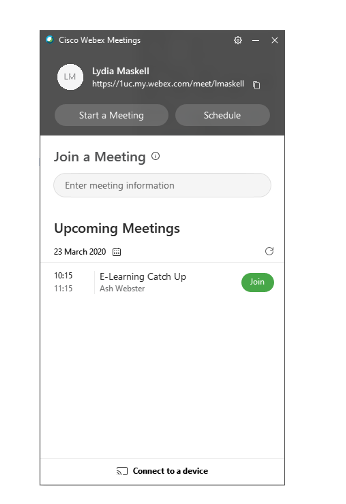
- From the Webex desktop app – Simply click the “start” button next to the meeting listed.
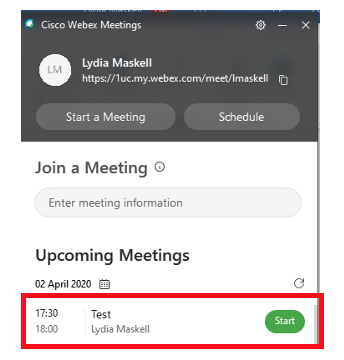
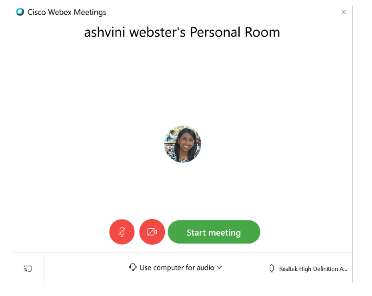
The WebEx meeting window will pop up and you can check your audio and video settings before going into the meeting. When you’re ready, hit the green ‘Start meeting’ button.
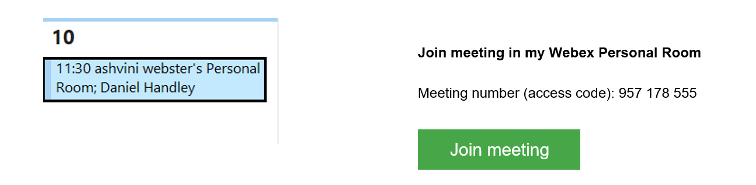
- From the Outlook Invite – Alternatively, you can start the meeting by simply opening the meeting invite and clicking the green join button.
Joining a meeting
Again there are a few ways to join a Webex meeting:
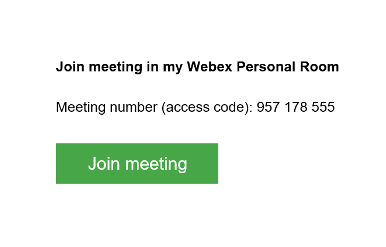
- From Outlook- To Join a scheduled Webex Meeting, locate the appointment in your calendar. Open the invite and click the Join Meeting button to join via the computer
- From a phone – To join via a phone, call the number that is displayed in the email invite. Once dialled, you will be asked for the meeting ID number. This is found in the calendar invite. For international callers there is a link to click on where you locate a local dial in number

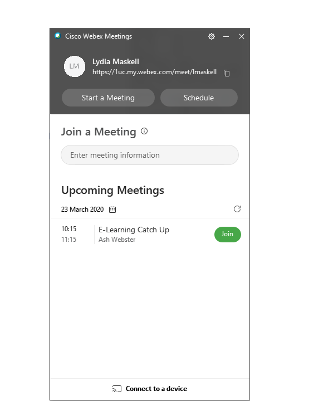
- From the Webex desktop app – simply click the green join button and you will be taken straight to the meeting
Audio and video
Regardless of whether you are joining as host or an attendee, Webex will bring you to the following window. When joining any online meeting, it’s always important to make sure your audio and video is setup correctly.
Before joining a Cisco WebEx meeting, you can decide how to join the audio. Go ahead and click the drop down in the middle and you can see your three audio options.
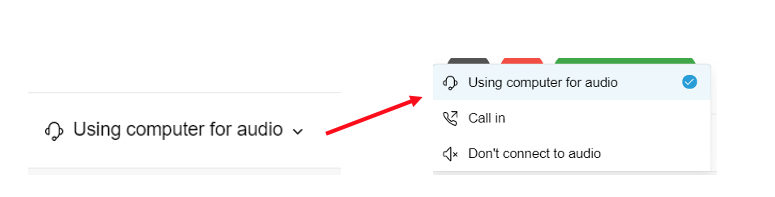
- Use Computer for audio- If a headset & speakers are connected to the PC, we strongly advise using the ‘computer audio’ option.
- Call in- If you are dialling in using a telephone or mobile, then select ‘call in’. The dial in details will be given once connected to the meeting.
- Don’t connect to audio
You can also test your audio Setting before entering a meeting to do this click on the settings button.

This allows you to not only change your speakers or microphone, but test they are working.
When you click the ‘test’ icon, a ringer will play, you can check you have the selected the correct speaker setting.

The blue bars below the microphone drop down indicate if the microphone is picking up your voice.
If you select the incorrect settings, don’t worry this can be changed whilst you are in the meeting.
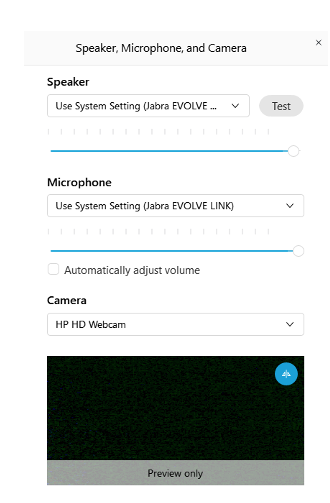
Select the speaker, microphone and camera settings to make any adjustments
Here change your speakers or microphone, but also test they are working.
You can toggle between all your speaker or microphone options by clicking on the arrow to display the drop down menu.
When you click the ‘test’ icon, a ringer will play, you can check you have the selected the correct speaker setting.
You can also edit your webcam settings.
The Interface
Now let’s have a look at some of the controls when you are in a meeting.

The controls at the bottom of the screen give you the ability to:
- Mute your microphone
- Turn your video on and off
- Share documents/Applications/desktop
- Record the meeting
- View meeting participants and active speaker
- Sending chat messages
Under the more option, you are able to
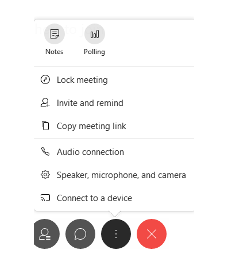
- Lock the meeting
- Invite and remind attendees
- Copy the meeting link (and send them as a message or email)
- Audio Connection
- Speaker, Microphone and camera – Adjust audio and video settings
- Using notes
- Whiteboard
- Polling
There is so much more to Webex but we hope you have found this basic guide to getting started helpful.
We offer training on Webex and many other Unified Communications technologies.
Please feel free to contact us for more information.
